Showing posts with label Reference. Show all posts

Tuesday, April 12, 2016

Shrimp Spotlight: Blue Bolt

Hi Folks!

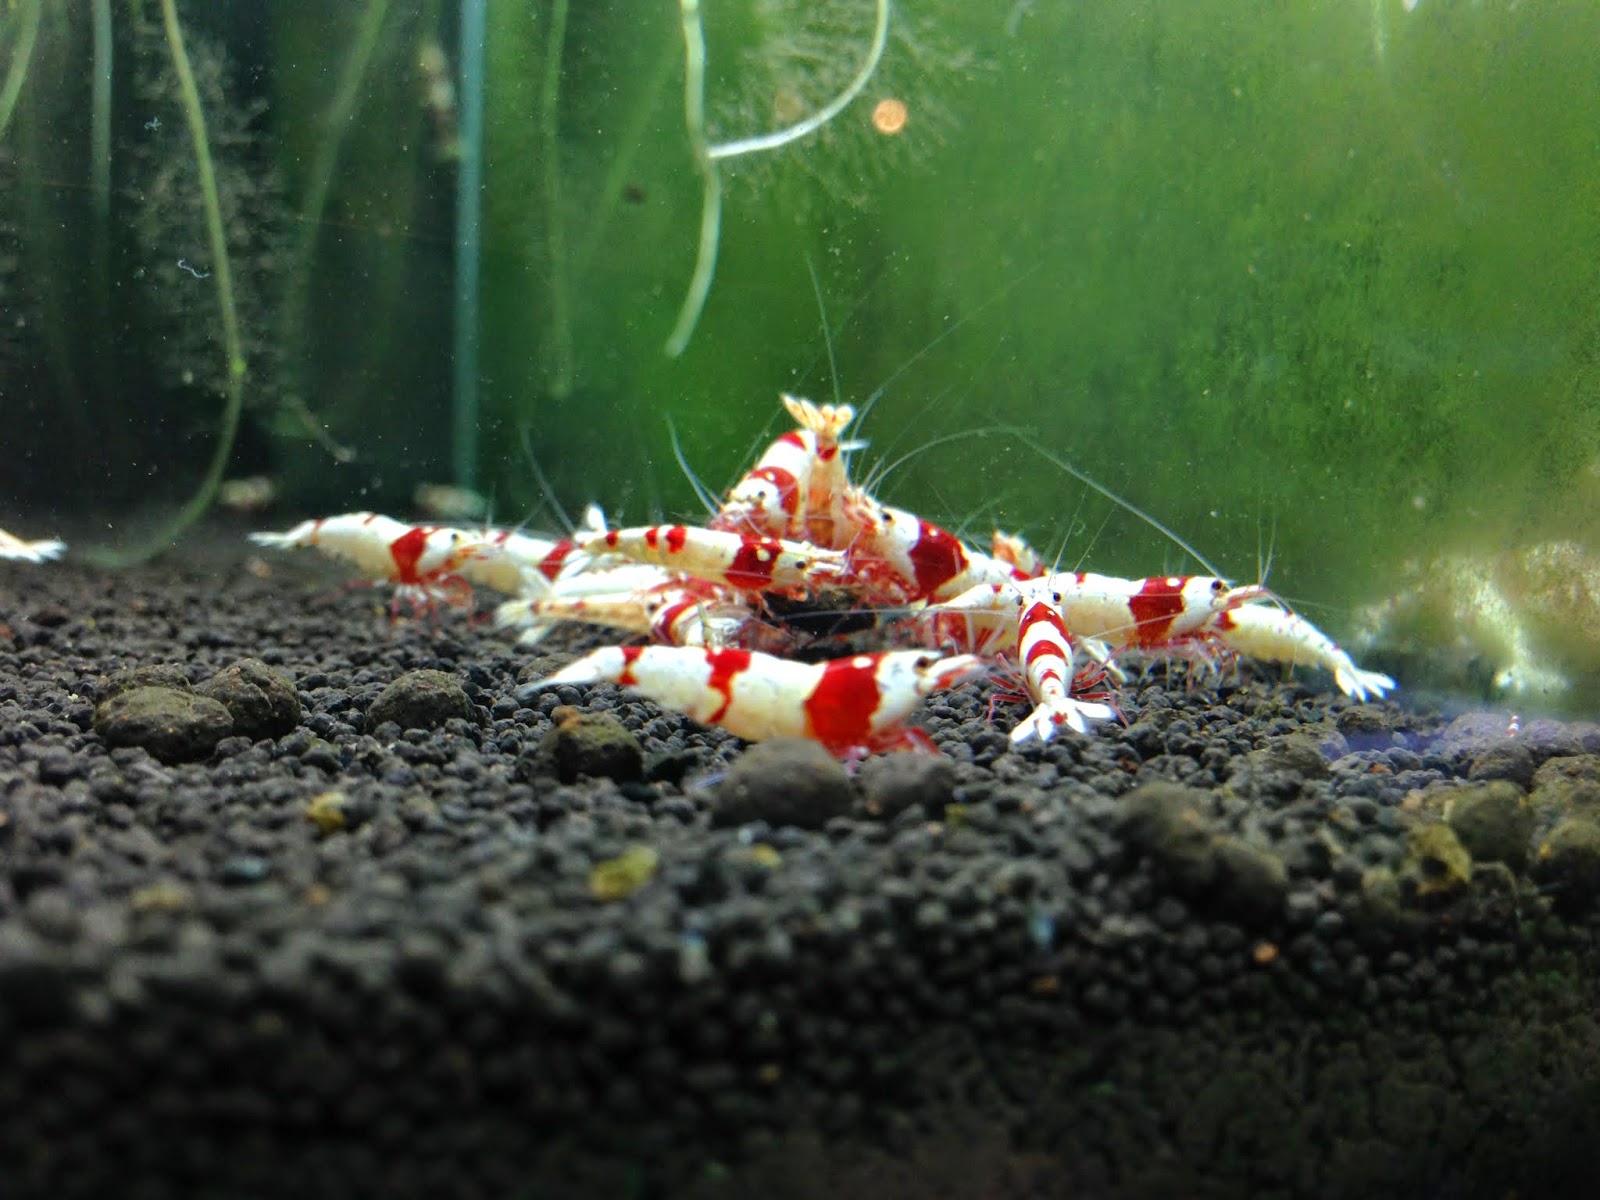
Not much happening in my shrimping world as of late, but I wanted to provide an update with some good news. Some might already know, but a while back, I had a mishap. This mishap just so happened to cause a large casualty in my Blue Bolt/Panda population. This was... deviating, to say the least! I was down to my very last "pure" Blue Bolt (female) and Panda (male) that I was riding my hopes on. It was a big relief to discover that after moving the remaining pair to a new tank, they successfully bred and now I have a larger colony of Blue Bolts/Pandas Taiwan Bees to try to rebuild my once thriving colony. 

To my luck, it just so happen that my female and male were of exceptional grade. I'm very fond of my female so I'm sharing photos of her with everyone tonight! Please enjoy!!

Up Close and PERSONAL!


My ABSOLUTE favorite shrimp pose. Heads up, tail down ;]

Sunday, October 25, 2015

Inert Substrate Trail/Experiment pt.3

Posting a very short entry today. 

3 Days after adding 100g of Sera Super Peat, the tank has gone from 7.3pH down to 5.9pH. I'm at a situation where I hope the pH doesn't continue to drop. I need it to stabilize around this range to allow me to keep bee shrimps successfully. 


I think I've been recently inspired with a new scape idea. Something new, something I've never done before, but something I predict will be very fantastic! I'm very excited to try this new scape  I hope you guys stay tuned for updates!

Cheers!

Thursday, October 22, 2015

Inert Substrate Trail/Experiment pt.2

It's been about a month into the trail and things are moving slow. Sorry folks! Partly (or mostly) due part to my laziness and RL commitments. It's been hectic with work and trying to figure out new living conditions. The  news is I might be moving to a different house by the end of the month. The downside is of course, I am limited on time and what I can do. The upside is once the move is finalize, I will have my own space and a larger allowance of space to have tanks!

As an update to the tanks, as a few folks are curious to know, the tap water used for cycling the tank has been completely drained and replaced by RODI mineralized with the Bianco products. I was testing the water the day after the water swap and noticed that the pH was climbing back into the neutral ranges (7pH).  Having already anticipated this would happen, I ordered Sera Super Peat to counteract the problem.  The super peat should serve as a temporary buffering agent for my tank while the tank develops it's down humic and fulvic acids which will enable it to buffer the pH on it's own.

A little thing I had not anticipate (and notes for those seeking to try this) is a means to utilize the peat effectively. I found out quickly that adding the peat to the canister filter was going to be a living nightmare! The seer amount of work needed to disconnect, remove, open, add the peat, reseal, reconnect and start the filter was overwhelming, to say the least!  So, I did a little brainstorming and opted to use a HOB filter as a media carrier for the 10G tank. A nice added benefit of having a HOB housing media is now I can more easily (and regularly) swap out old Purigen for new Purigen. At my parent's home, both my JRB and JBB have HOB and that's the same thing I do there. Tanks there looks nice cleaner and nicer than the ones at my GF's house. 

After adding the Sera Super Peat, the tank's pH dropped from 7.3 down to 6.9 over a 24hr period. I predict the drop in pH will continue throughout the week.  The current plan on the agenda is to move some moss already growing on a piece of DW up to the new tank. Also adding in some Amanos to clean the tank and moss up a bit before I add the cull JRB. I'm also planning on injecting more CO2 to get as much nice growth from the moss as possible before I have to dial back when JRB are inside.


Prior to adding Sera Super Peat
24hr after adding Sera Super Peat

Overall, I really enjoy the inert substrate.  Everything about this substrate so far has been nothing but positive. I love the look and the feel of the substrate and really enjoy the fact that I can so easily clean the substrate and not have to worry about it breaking down or kicking up mud from already broken down soil.  

Until next time! Cheers!


Monday, September 21, 2015

DIY Corner: Fan Power pt.2

Hi Folks!

Back with another update on the DIY Fan setup. Aftering using this fan for sometime and really seeing just how effective the cooling via PC fans was and how viable it is for folks living in hotter areas, I wanted to figure out how I could improve on an already effective method. 

I realized that I couldn't really do much to increase the cooling capacity, but I could work on finding an effective way to combat the evaporation for my tanks. Realizing that the fan's doesn't need to be in operation for 24/7 (or until I turned it off manually) I opted to find a smart solution.

I am very pleased to be introducing the brain-ware v1.0. This brain-ware is rigged to kickstart the fans at set temperature and auto on/off when the temperature is met. This allows the tanks to stay cool but eliminates the human need of constantly monitoring and topping off the tanks. 

The temperature probe is very effective at monitoring the tank's temperature and making sure the tank is never above set temperature. For all my tanks, I've rigged PC fans and the brainware to monitor each tank's temperature. 

To test how effective this brain-ware was at maintaining the correct temp, below are a few photos of my Ellen Wang tank kept cool by the brain-ware. 

Sunday was a very hot day. I wanted to test the extremes of the PC fans and brain-ware. 

Sunday's outside temperature was 100F.
100F Day


As you can see, with the PC and brain-ware, the Ellen Wang PRL tank is kept at a nice cool 73.9F


The probed indicated that the temp increased by .01F by the time I moved closer to the brain-ware to take photo.


The temp of the room with probe outside. 89.7F is no joking matter. This little fan has enough power to pull the tank's temp down from a balmy 89.7F to 73.9F without breaking a sweat! That's a 15.8 degrees drop! 

As you can see, not only is the PC effective on days with of 100F temps, the probe is very accurate at monitoring the temperature. It's on/off function is just fantastic and really gets the job done!


Saturday, August 29, 2015

Inert Substrate Trail/Experiment


I've been a long time advocator of using active buffering substrate when keeping bee shrimps but as we all know, active substrate is pricy and can be very expensive. With prices ranging anywhere from $30-$40/bag, it can really add up depending on how many tanks and the size of tanks you want to setup.

As such, I wanted to try to find an alternative substrate that would be more cost efficient and that would allow me to better allocate my funds towards other things like more fancy shrimps or other fancier equipments. One of my goals with using Eco-Complete is to have a sustainable tank for years to come and avoid having to swap out the substrate as the buffering exhausts, something more commonly experience among those using active substrates. Myself, I've been using the same ADA Amazonia  for my 10 gallon PRL tank for roughly 3 years before needing to swap and restart the tank. My goal this time around is to avoid the hassle and have a tank sustainable nearly indefinitely. I believe having an active substrate tank for 3 years before needing to swap the entire tank is actually pretty good, but I'm not aiming for good this time. I'm aiming for perfection.  :)

After spending the better half of my Friday doing nothing but tank maintenances and tearing down the revamped tank, I am pretty happy to have the entire process completed and over. It was a lot of work to drain the water, net the shrimps, re-home the PRL, remove the substrate, clean the tank, and tint the tank. This was all done on a 91F day... it wasn't fun...

The Eco-Complete had a really smelly smell, so in the meantime, I will be cycling the tank with regular tap before I flush and seed it with RODI mineralized with the Bianco Products. Of course, this new tank will utilize the entire Shrimpy Daddy lineup.

Another goal I hope to prove (SD has already proved this, but I want to prove for myself) that it is doable to breed and maintain a thriving colony of bee shrimps (in this case my JRB) inside a inert tank.

The believe the first few months will be present a difficult situation as I try to maintain the tank's parameters (because I will not have the active substrate helping me) but as the tank matures it will slowly stabilize the work will be lesser on me.

As per usual, below pictures shows my tank setup in SD fashion. Please enjoy.

The Goods

Step 1: Cleaned Tank

Step 2: Revive Vita 

Step 3: The Sinewy Cereal S

Step 4: Revive Vivace

Step 5: Revive Minerals

Tank is filled, filter is hooked up, and light is turned on. I'll provide an update once I perform a flush to clean up the water inside the tank. It's currently very murky and unsightly. In the mean time, I'm going to even out the substrate in an increasing slope (for photo taking) and slur the substrate lightly while I'm at it. This will help release any gunky substrate stuck in the substrate. My plan is to be as eco-friendly as possible, and being that California is currently in a drought, I want to get the maximum results for the least amount of water used.  

PS: In hindsight, I'd probably should have gone with the Eco-Compete Flora Max which is the dried form of the Eco-Complete. It's a little bit better and probably easier for me and helps me avoid this murky look. Hmm....note for the future I suppose. 

Anywhose, cheers and thank you for reading! Stay tuned for my next update!

Wednesday, July 29, 2015

DIY Corner: Fan Power!!

Hi Folks!

With the onset of summer in full swing, depending on where you're living, you may or may not be experiencing heat problems. I figure I make a short entry to help folks explore a different cooling method other than the typical cooling methods such as chillers (expensive), AC (also expensive and not every house has one), freezing ice bottles and adding it to your hot tanks (highly ineffective), and many other misc. methods. 

As we all know, summer can be a big issue for those living in places that experiences extreme temperatures. Myself, I am living in an almost desert like state, and our summer gets pretty..warm.. I usually dread the summer because all my hard work breeding and rearing my shrimps ends up dying due to the hot summer (also I hate the sticky icky summer and I have bad allergies).

As such, I wanted to share something that I've found to be extremely helpful at cooling and fending off the summer heat. I am a big advocator of using fans to air cool my tanks. Fans provide cooling to our tanks in the form of evaporation. If you can deal with this problem, then air cooling is a very efficient and cost effective way at dealing with the heat.

Clip on fans (Aquarium Fans, keyword ebay search) are very easy to find. If you're not techy, then I would highly recommend searching for an eBay auction and just buying a pre-assembled setup. Having been using the China made aquarium fans since 2014, I can confidently say that they work. Not only do they work, but they work pretty well. The only downside of the fans are that they are quite noisy, and the prices of individual units are high and can really add up of your an enthusiast with many tanks (as I am assuming you are if you're reading my blog). 

After buying 3x China made aquarium fans and spending nearly $120 for the lot, I figured there must be a more cost effective approach to cooling me fan. I figured that PC Fans wired into a DC power source is something not overly difficult and thus could be sourced and made in scale at very affordable prices. And so I started my search and planning. I wanted something that was aesthetically pleasing but had function and form to support.

Below is a prototype of what I came up with. This is a singular PC fan wired into a DC wall adapter. Unlike the China made fans that comes with a minimum of 2 fans, this single 80mm monstrosity is a single unit that packs enough cooling power as the 6x fans unit... no lie.... 


This is a 3-spd Antec 80mm fan that I found and decided to use as my prototype. This fan was small enough to be discrete but had enough power to cool a 20G long without much effort.


For the longest time I struggled to figure out how to attach the fan onto the tank. I found that it was too costly to have plastic fabricated to fit my aquarium. As such, I found a L-arm that provided the perfect fit. 


Wires all hidden behind the heat shrink cable and connector plugs. I'm all about aesthetics, so looks was an important factor to account for. If I couldn't achieve a nice looking cooling unit, then I would not pursuit this project in the first place. #1 Rule: Aesthetics


A closer look at the L-Arm that allowed for this entire project to happen. This little guy was the catalyst that made it all happen.  This serves as a very tight clamp and can be  modified to fit any size Rimless GLASS tanks under 40G.
  

The 3-spd controller. Another reason why I decided to opt for the Antec fan is because this particular unit allows the end user to set speeds at low, medium, and high. You may be wonder why this is important? Well, this factor is important because this single 80mm fan can be fitted for tanks as small as 4G all the way up to 25G. Having a speed controller will allow for less evaporation if fitted for a smaller tank. The cooling provided will be the same, but the low settings help cut down the evaporation. Additionally, on warm days, you can change the settings down to low and have the fan run all day and maintain the tank's cool temperature or set to high if rapid cooling is required. Lastly, the low - medium settings is very quite, unlike the China made fans. Suitable for bedroom tanks.


Photo of this unit clipped on the side of my 60P. It's very discreet and actually looks much better than the bulkier China made fans. 

Special thanks to my dear friend Gene for helping me understand how the rig this setup and for inspiring me to find a more cost effective approach to keeping my tanks cool. 

Sunday, March 15, 2015

Shrimp Spotlight: Japanese RedBees

This is an observational update regarding the status of my Japanese RedBees. It's been roughly 3 months now since I've been back from my Japan trip and my Japanese RedBees have had 3 months to breed and grow inside my tanks. The adults survive the journey from Japan to USA and have bred successfully inside my tanks. I’m very happy to report that I am officially out of the “Red” or danger zone. Now that spring is in full swing, both my J.RedBees and J.BlackBees have kicked into full breeding mode. Both bees inside my 25G cubes are very active happy. All of my original female adults are berried.  Their ovens are operating at maximum efficiency although I have to comment that my J.BlackBees is just crushing it! My J.BlackBees colony has undergone a population explosion. The tank is FILLED with babies and young adults.  I feel like my J.RedBees need to play a little catching up if I want to have a strong population to cull by the end of fall 2015.

Observation:
I've made note that J.BlackBees are all born with EXCELLENT colors, whereas the J.RedBees are born with exceptional whites but the red is a bit more of an orange color. At first I was curious and worried about the off-red color that I was experiencing BUT as they grow and mature their colors is darkening and becoming a more crimson color. I don’t know if this is a common thing amongst J.RedBees. Additionally, I have observe that the J.RedBees mature VERY quickly. What I mean to say is juveniles at 3 months are roughly a third of the fully mature adults. This isn't something that should be taken with a grain of salt as J.RedBees is much bigger, on average, than PRL. I don’t know what it is, but it would seem that their genetics dictate their growth to be fuller and bigger than your typical PRL. I have PRL roughly around the same age as my J.RedBees and they look nowhere near breeding size.  Breeding Size? Yes, I am saying breeding size because in the adjacent tank housing my J.BlackBees, babies of 3 month old have started mating and becoming berried.  Babies making babies, yo!


Thank you for reading!

Cheers!

Monday, January 12, 2015

Rack: Dual 10g Setup


I haven't been feeling too well lately, maybe I'm coming down with a cold, but I was able to devote sometime during the weekend to setup a new tank and complete by dual 10G rack setup.

Both tanks are sitting on one of those stainless steel wire shelf (available from HomeDepot or any home important stores) with a custom cut piece of 1/2" plywood to evenly reinforce the stand.

Tank: 10 Gallon Rimless 
Filtration: Eheim 2213
Heater: Eheim 'Jager' 50Watt
Substrate: ADA Aquasoil - Amazonia


Step 1: Preparation

I start off by giving the tank a nice cleaning. My goal is to tint the back piece of glass of this tank so a nice cleaning with gloves to prevent fingerprint marks and oil from developing on the glass is required. I bought this tank from a local store in SF for a great price. This tank has curved fronts, but still sexy and for the price I bought it for is a major steal. Overall, tank costed me $20 which is really cheap for a rimless tank.


Step 2: Inspection

I turned the tank backside facing up to closely inspect the surface. I wanted to make sure that the surface was well prepared and ready for tint application. I decided to only use water for the tint (suppose to use water + soap) because I didn't want to risk soap residue getting into the tank and cause issues in the future.


Step 3: Application

Tint is carefully measured and cut to size. The tint is tricky to cut because window tint (the type I'm using) is sized for large windows. It's easy if you already have the measuring equipment but could prove tricky if you don't as cutting straight lines could prove challenging.  The tint was harder to apply because I wasn't using the soap method, but overall, I'm happy with the look and the outcome.


Step 4: Position

After applying the tint and drying the excess water, I positioned the tank into the allotted space on the rack.  It took awhile to get the perfect measurement from floor to tank top because I wanted to make waterchange as easy as possible, and in the past, I've always positioned my tanks so low to the floor that made siphoning water is impossible. This is a good thing to remember and must be accounted for when setting up tank on racks.


Step 5: Position take 2

I had to remove the top tank to position the light for the bottom tank. I had a stroke of genius and managed to hook the light mounting legs backwards and apply hooks to them to hold into place. This allows me to hang the light securely and safety on the rack. This hook method allows me to more easier remove the light for maintenance in the future and also hang the light further up as to prevent algae from forming I also took this opportunity to reposition the light rack to accommodate for the filters, CO2 and electrical plugs.


Step 6: Condition - Bacteria

The following 3 steps are conditioning steps that most successful shrimp keepers do to ensure their substrate is enriched to ensure long term success in shrimp breeding.

Drops seen on top are droplets of Revive Vita, a proprietary product designed and created by my friend, ShrimpyDaddy, given to me to cycle my tanks faster and provide long term successful with shrimp keeping. Revive Vita will give tank/substrate and supercharged start. In my previous experience with starting tanks with Revive Vita, I've been able to cycle a tank using ADA AS Amazonia in 2 week (pretty quick for anyone who knows how long it usually takes to cycle ADA AS).


Step 7: Condition - Minerals and Traces

In this stage of the setup, I'm applying minerals and trace elements to the base layer of the tank. I'm using Revive Minerals and Revive Vivace for my minerals and trace needs. Revive Minerals and Revive Vivace isn't only useful during setup, all my tanks are dosed weekly with these products to ensure shrimps are provided all the necessary nutrients they require to develop healthy shells.


Step 8: Condition - Bacteria Food

Given that you have bacteria ready to go, you need to remember you'll need to supply a food soruce for these bacteria. Because Revive Vita is comprised of many types of bacteria, we need to met the food demands for these bacterias.  Revive Sinewy S (powdered form) is sprinkled evenly on the base. Sinewy Cereal S product designed to be used as a food for your substrate.  What??  Food for substrate??... ya.. right..... NOPE, this is true. Think of a well established tank as a closed eco-system. You're keeping many more living things inside your tanks than just shrimps alone. A healthy substrate means you will have a healthy team of decomposers which in turns will mean you tank will break down wastes more efficiently and prevent those random colony collapse many folks experience.


Step 9: Fill

Time for the tank to be filled with substrate. The tank is filled in a sloping manner. I have the tank as 6cm in the front sloping to 8cm in the back. After the substrate compacts, I'll be left with 4cm and 6cm, respectively. 

Why Slope? - Sloping a substrate is a great way to ensure you have the ideal setup for taking photos of your shrimps in the future. Sloping and moving the substrate becomes impossible once shrimps are moved into the tank. It's always best to do sloping during the early setup stages.
     

Step 10: Flush

Now that the tank is all setup, it's time to fill and flush. ADA Aquasoil series has a lot dust during the initial setup. This means you'll need to flush the tank a few times to clear up the murky water. After the subsequent flushes, the tank will be crystal clear and cycling can start.

Filters all hooked up and equipment plugged in. The tank will be cycling in 82-86F temp for the next few weeks. Remember how Revive Vita contains many strains of bacteria? Well, these stains of bacteria do best in warmer waters. They're activated in warmer waters so this should be considered the most important step.

REMEMBER: Add Activated Carbon to your filter for the 1st week to absorb harmful substances leaching out of the substrate. This will also help your cycle. 

Thank you for reading.

Will update when tank is cycled!!

Cheers ^.^

Sunday, December 28, 2014

Japan: Adventure at Lowkeys-Osaka location

Store: Lowkeys
Location: Osaka HQ
Specialty: Japanese Red Bees, Japanese Black Bees, Pintos, and Taiwan Bees


This post entry is a few days overdue, but it has been a busy week with the Christmas hitting us and me getting situated back at work and a few other shrimp related matter that required my immediate attention so I do apologize.  


One of the last shrimp related things I did while in Japan was visiting Lowkeys HQ in Osaka. This store is truly a shrimp lover's paradise. This store has literally has a HUNDRED tanks filled to the brim with shrimps. When I entered the store, workers were busily packaging shrimps in boxes and marking them to be shipped (which I assumed to be shipped all over Japan). The store comprised of 5 workers who were all busily running around helping customers and do other shrimp related things. The walls of the store was stacked with shrimp related goodies (foods, toys, accessories), and just a ton of tanks. Lowkeys Osaka really knows how to do shrimp racks, it contained the most beautiful shrimp rack I've ever seen. The rack is stainless steel painted gun-metal color (similar to the ADA Stands) and was just perfectly fitting their small tanks. Everything just looks wonderful and so well thought out.

The trek to find Lowkeys Osaka (similar to Lowkeys Tokyo) proved to be difficult, albeit, not as difficult as locating Lowkeys Tokyo. The store was located on the main street, which is very easy to spot once we figured out the path to take from the trains to the main roads. Walking was roughly 20 mins, but it was well worth it.  

Store Front
This store isn't as big as some stores I've seen in HK but it definitely has the most tanks and the widest selection of shrimps and products. This store is just wonder and there's nothing else I could really say to describe the feeling of being in Japan's #1 hot spot for any and all things shrimps. The store is divided in 4 walls filled with shrimp tanks (basically encompassing the entire store) with stands and racks of shrimp products and shrimp goodies littered in between these tanks.

Please enjoy and share my experiences at Lowkeys Osaka captured in the photos below.

Very happy
Lowkey's Motto

Happy customer picking he/her shrimp

Lowkey's Main Display Tank


Huge Mix and Match of shrimps... Mainly TBs..


Told the GF to go wild with my camera ^.^
...looking...
...spotted... *smile*...
A tank filled with ¥50000 shrimps.. SOLD OUT!
The store's mascot and me

Reminder to myself that I bought 3 JBB at ¥30000 each
This area is dedicated for TB, Pintos, and Tigers.. very small selection


JRB I hand picked from their best tank ^^
These guys were among the best of the best!
Spotted-Head Pintos


Black Diamond Tigers (not to be confused with Royal Tigers)


More JRB
hmmm..more JRB...


Makes you wonder why you'd keep PRL.. LOL!!
Japanese Pride. I love Japanese Red Bees!!!
These guys would CRUSH any HK/TW PRL any day
Mascot patrolling
Well deserved lunch break
Initially, my plan was to visit Lowkeys Osaka, Aqua Tailors and Samurai Jeans while I was in Osaka but because of the schedule I had to cut Aqua Tailors' visit out of the itinerary. Because Aqua Tailors and Lowkeys has a partnership, I felt it was time better spent visiting Lowkeys (the store is bigger and the main HQ) instead of Aqua Tailors, but I would definitely visit Aqua Tailors on my next trip to Japan.   

The staff and us
Some funny outtakes of my adventure.

GF thought the one piece jumpsuit was funny.. I'm a fan of one piece ^.^
My second passion... raw denim.. yum.


took the female staff 5 times to get a great photo!  Dang her finger!!
Overall, I was really satisfied with having the opportunity to visit Lowkeys Osaka. I'm happy that I got a chance to see this wonderful store and their wonderful tanks filled with shrimps. The staff were wonderful and I would love to visit this store again on my next Japan trip. 

Thank you for reading and following! Cheers!!